Summer Cherry Crisp Recipe

fresh cherries

cherry crisp with ice cream top view

A crisp or crumble recipe is a beautifully simplistic way to enjoy seasonal fruit. This recipe can be pared with your favorite fruits all summer long, whether it’s cherries, blackberries, peaches, or apples to pick.

The first crisp of the season at our house is always sour cherry.  We have many fruit trees on the farm, but my husbands favorite is THE sour cherry tree.  Although we have planted other trees, he says the one his Great Uncle Glenn planted is the best. This cherry trees fruit has the perfect amount of tart with just a hint of sweetness, and I think that’s what makes it perfect for this recipe.

Filling

  • 5-6 Cups sour cherries, stemmed and pitted
  • 1/2 Cup sugar
  • 2 T corn starch

Topping

  • 1/2 Cup (1 stick) butter
  • 1 Cup flour
  • 1/2 Cup oats
  • 1/2 Cup chopped pecans
  • 1/2 Cup brown sugar
  • 1/4 tsp cinnamon

Pour sour cherries into a 2 ½ quart baking dish and lightly toss with sugar and corn starch to coat.  In a stand mixer, cream butter and brown sugar.  Add flour, cinnamon, oats, and chopped pecans.  Beat on a low speed until mixture is combined and slightly crumbly.  If mixture is still sticky, you can add more flour.  Top sour cherries with crisp and bake in an oven @ 350° for 20-30 minutes, until bubbling and golden brown on top.  After your crisp has cooled from the oven, serve with a scoop of vanilla ice cream and enjoy!

IMG_6291 IMG_6292 IMG_6295completed cherry crisp from oven

Advertisement

Cooking with Chef Natalie – Bacon Wrapped Asparagus and Creamy Baked Asparagus

IMG_3190

Meals are an experience at our household, whether you’re hands on in the kitchen while the festivities begin, enjoying a glass of wine while we stir up some fun, or awed by the serenade of cuisine set at the dinner table.  Tastes, smells, and sites to be seen as your senses dance with excitement.

I enjoy cooking and nothing makes me happier than seeing the fresh produce I’ve grown on my farm turned into delicious recipes for everyone to enjoy!  Early spring asparagus is so exquisite I normally take a simplistic approach to recipes not to overshadow the fresh flavor.  I invited Chef Natalie to my kitchen to prepare two asparagus recipe’s to accompany our dinner.

cooking with Natalie 01Natalie cooking 04 edited blanching asparagus 02

You should always use the best ingredients that are made available to you and that fits your budget.  It’s a simple tip but one that makes a huge difference.  We used fresh thick cut bacon from our neighbors farm to flavor and accompany our home-grown asparagus.

Bacon Wrapped Asparagus

  • 1 1/2 lbs. Fresh asparagus spears
  • 5 – 8 Pieces of fresh-cut bacon
  • 2 T Olive oil
  • * Black pepper to taste

Clean the asparagus and break off the end pieces.  The stem will naturally break at the tender spots and you can discard the end pieces for compost or use to flavor soups.  Lightly brush the asparagus with olive oil and pepper to taste.  Spiral wrap 2 – 3 pieces of asparagus with bacon.  You can secure the pieces with a tooth pick before grilling if needed.  Place the asparagus on the grill and cook until bacon is crisp and spears are tender.

grilled asparagus IMG_3187 FullSizeRender[2] Creamy baked asparagus

Creamy Baked Asparagus

  • 1 lb.  Fresh asparagus spears
  • 1/4 Cup  Peppercorn Ranch Dressing
  • 1/2 Cup Grated Smoked Gouda Cheese
  • 12 Ritz Crackers, coarsely crushed (about 1/2 cup)

Preheat the oven to 350°F.  Clean asparagus spears, remove ends, and blanch in water for 2 -3 minutes.  The asparagus should be bright green and still crisp.  Drain and place in a baking dish.  Add dressing and toss to coat, then sprinkle crushed crackers and top with smoked gouda cheese.  You can substitute the gouda for parmesan or cheddar cheese if you have that on hand, but trust me the gouda is good.  Bake in the oven for 10 – 12 minutes until  the top is lightly golden and crisped.  This recipe was modified from the original on KraftFoods.com.

» If you’d like to grow your own, check out my recent “How To” post on Planting Asparagus!

A Taste of Summer Throughout the Winter: Canning Salsa with Recipe

salsa finished

Of Course I Can, and you can too! This is only my second summer of canning and with each recipe I learn how to be more efficient and comfortable with preserving our farm bounty. There are many helpful tutorials online and I use the Ball Blue Book – Guide to Preserving as my go-to kitchen reference for all things canning. The most important step to remember is following the sanitary and processing guidelines. Safety first!

It has been a busy summer and I have learned so much from my apprenticeship at Riverbend Roots Farm. The team I work with are more like family then coworkers and I hate the idea of leaving them.  My bosses Kris and Stacy are amazing farmers who share a passion for bringing naturally grown farm fresh produce to customers, as well as, sharing their knowledge with aspiring farmers-in-training. I am so lucky I have had this opportunity to learn from the best.

I’ve been applying what I learn to our farm and have had a successful harvest this season. I’m eager to move forward on a larger scale next year as I follow my farmDREAM. I love the fresh goodies provided during the farm season, but what about when the weather turns cold? Well, canning and preserving will give me a taste of summer harvest throughout the winter.

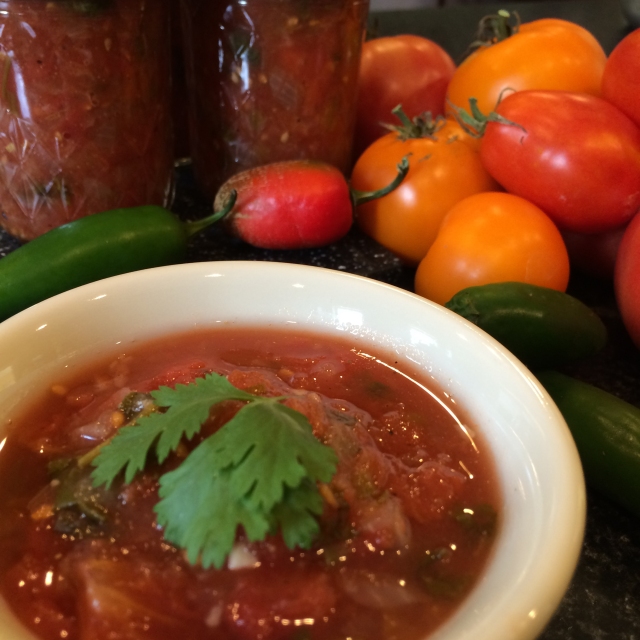
This year I decided it was long overdue to can salsa. This recipe is my first attempt and I’ve been receiving positive feedback thus far. I use what’s available at the farm and have noted the measurements that appeal to us, but if you prefer more or less of something make the adjustments and you will have great salsa every time! The best thing about any recipe is that you can make it your own.

Homemade Salsa Recipe

  • 10 Cups tomatoes; peeled, cored, chopped, which takes about 8 lbs of fresh tomatoes
  • 1 bell pepper
  • 1/3 Cup seeded, chopped jalapeno peppers (about 5 small jalapenos)
  • 5 Cups chopped onions (1 large red and 4 small yellow)
  • 4 cloves garlic or 2 tsp minced garlic*
  • 1 Cup lime juice*
  • 1 bunch of fresh cilantro (about 1-2 Cups)*
  • 1 ½ teaspoon ground cumin
  • 1 ½ tsp salt
  • 1 tsp black pepper

*½ tsp minced garlic = 1 clove of fresh garlic

*Acidity is needed for canning. You can also use lemon juice or cider vinegar but I find lime juice has the best taste for salsa.

*based on your taste you can add 1-2 Cups of fresh cilantro. I use 2 cups when cooking my recipe because we love cilantro! In addition I chop ½ cup fresh cilantro and mix into salsa before serving.

tomato bath

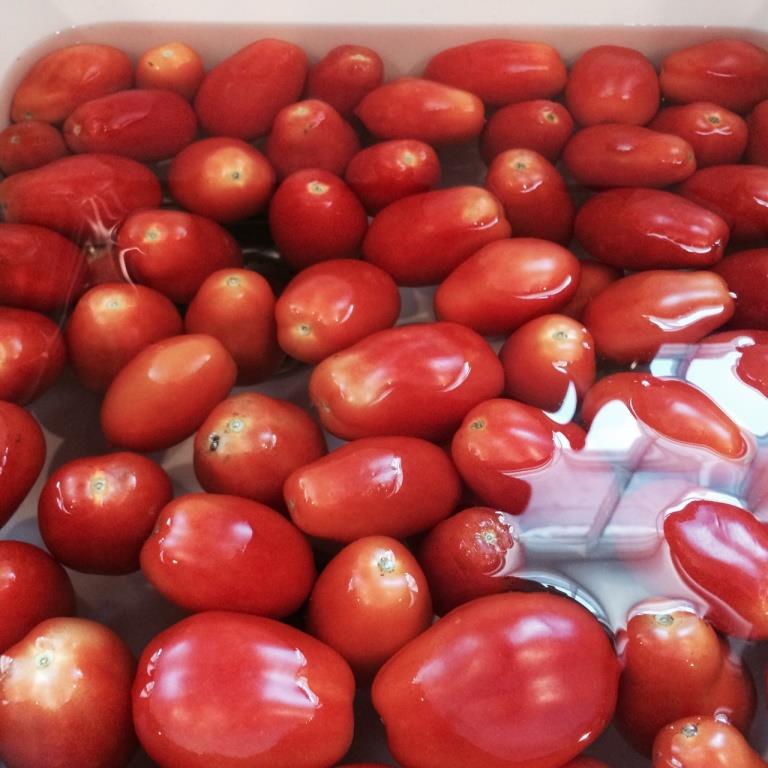
1.  Place whole tomatoes in a pot of boiling water for 30 seconds and then immediately remove and place them into an ice water bath. Remove from the water and easily peel skins.

2.  Dice tomatoes and remove seeds.  After measuring 10 Cups of tomatoes I pour into a strainer to remove excess water.

3.  Remove seeds and veins from jalapeno peppers. If you like your salsa hot you can leave some of the seeds and veins intact. Chop peppers, onions, garlic and cilantro.

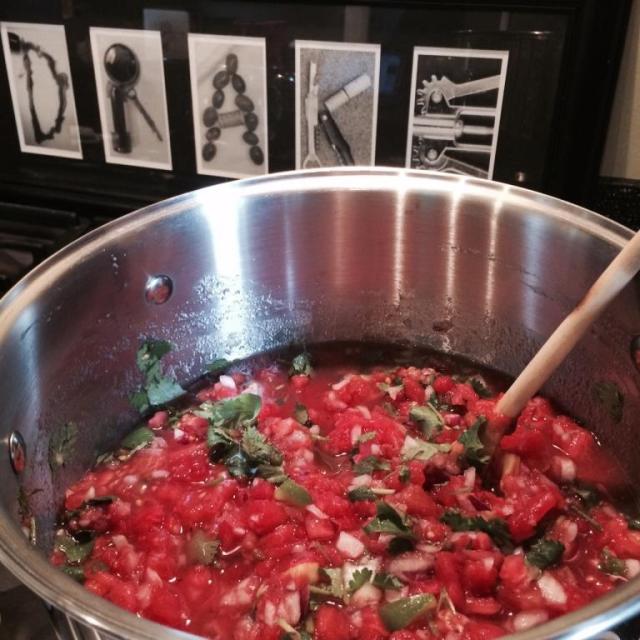
4.  Add all ingredients into a large stock pot. Add seasoning; lime juice, ground cumin, salt and pepper to taste. Bring all ingredients to a simmer and allow to cook for 18 minutes.
cooking salsa in stockpotSanitize glass jars, rims, and lids in hot water bath for use. Once your salsa has been cooked pour the hot batch into sanitized jars and twist lids tightly.

Process jars in a boiling water canner for 15 minutes. Once jars have cooled check center of lid and make sure the safety seal does not pop. If there are any jars that did not properly seal you can place in the fridge and use right away. You can also freeze the salsa.

I use what’s available at the farm and have noted the measurements that appeal to us, but if you prefer more or less of something make the adjustments and you will have great salsa every time!

Baked Pumpkin French Toast

pumpkin french toast bake 01An easy overnight French toast bake with the seasonal flavor of pumpkin.  Oh so easy, and oh so Dee-lish!

Ingredients
1 large loaf French Bread (about 16 slices) or two mini loaves

CREAM CHEESE FILLING

  • 1 (8 oz) cream cheese, softened
  • 1/2 Cup sugar
  • 1/2 Cup pumpkin puree
  • 1 tsp vanilla
  • dash salt

PUMPKIN MIXTURE

  • 4 eggs
  • 1 Cup half and half
  • 1/3 Cup sugar
  • 1/4 tsp salt
  • 1 tsp cinnamon
  • 1/2 tsp ginger
  • 1/4 tsp nutmeg
  • 1/4 tsp allspice
  • 1 Cup pumpkin puree
  • 2 T butter
  1. Butter a 9 x 13 baking dish.  Slice bread into ½ inch slices stacking two pieces on top of each other and place in dish.
  2. Beat cream cheese until smooth. Add ½ Cup sugar, 1 tsp vanilla and salt.  Optional – add 1/2 Cup of pumpkin puree, beat to combine.
  3. Lay out 8 pieces of bread. Divide cream cheese mixture over bread. Spread on slice of bread and top with another slice of bread to create cream cheese stuffed French toast.
  4. Make the pumpkin mixture by beating the eggs. Add the rest of the ingredients and whisk together. Pour over stuffed French toast.
  5. Top each piece of French toast with half a slice of butter.
  6. Cover with plastic wrap and refrigerate over night, or for several hours.
  7. In the morning bake uncovered at 400 degrees for 25-30 minutes.
  8. Serve with warm maple syrup and a dollop of whipped cream!  I also add pecans fresh from our farm!